Friday, August 31, 2012

Romance


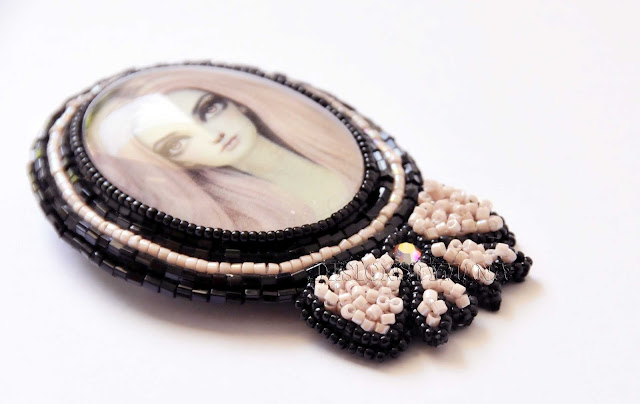
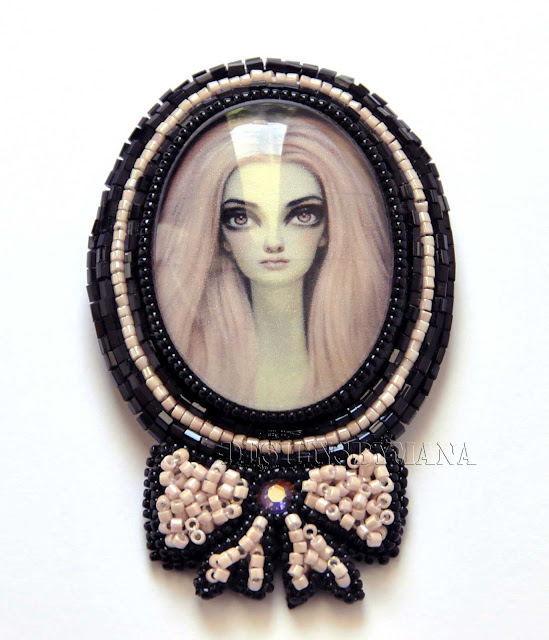
romantic brooch

I had wanted to something with a more romantic feel for a little while. most of my bead stash consists of  darker colours and I am slowly adding to the variety so it took me a while to get enough pale/ pastel-tone beads together to get a romantic feeling piece done.
romantic brooch

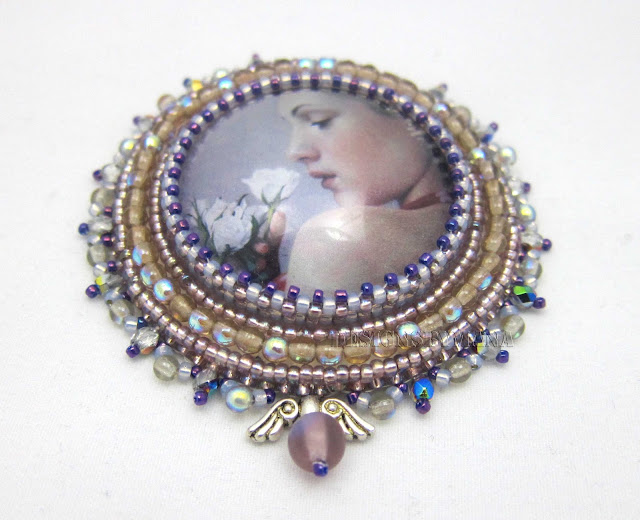
I looked through all the images I had gathered and I decided to use a painting by Mary Jane Ansell, a Brighton based portrait artist .she does amazing portraits, very expressive, the colours are very subtle so it was perfect for what I had in mind. This painting is called “girl with roses”.
romantic brooch

The beads I chose matched the colours in the painting perfectly, maybe a little too perfectly. The thing is, the colours in the painting are very subdued and pale so using pale beads did nothing to really bring the painting forward in my opinion, but even seeing this I didn’t know what to do and how to make things better. I just kept going.
romantic brooch

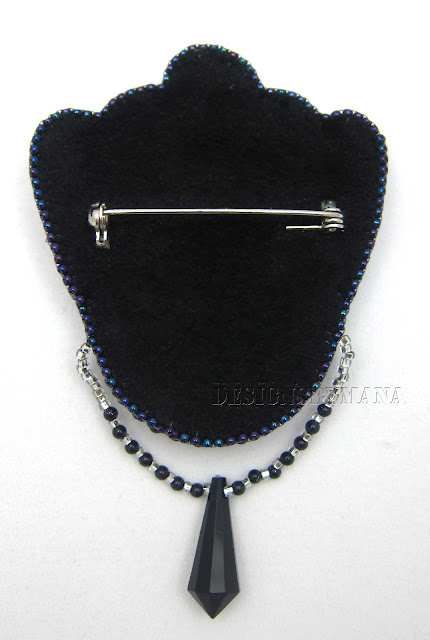
In an attempt to bring some colour to the piece I added some AB crystals around the piece. Also since I make a lot of brooches I decided to get these new pin backs with bails so the brooch can also be used as necklaces.
romantic brooch

The thing is I am not in anyway shape or form at ease with using these sorts of colours so maybe I am just being too picky, but I have to be honest, this is not one of my favorite pieces. I would love to know to know what you guys think! What would you have done differently?

LIST OF MATERIALS USED:


Posted by Mana © BeadFeast. All Rights Reserved

Thursday, August 30, 2012

A Different Kind of Friendship!!


beaded friendship bracelet

For a little break from bead embroidery I decided to learn how to make friendship bracelets!
I had never made friendship bracelets before. It wasn’t such a big thing amongst us when I was in school so no one ever bothered making them, the only friendship bracelet I had when I was younger was one I actually bought at a charity!
stacked beaded friendship bracelet

I looked up a couple of videos on Youtube and learned the basic knots but I could not for the life of me follow the patterns and understand the instructions they were trying to give. But one of the videos mentioned something about a pattern making program on a friendship bracelet website
 Since I really just wanted to do basic stuff and I had already learnt the 3 different knots used in making the bracelets I decided to give the friendship bracelet pattern generator a try and that was probably the best idea.
red beaded friendship bracelet

red beaded friendship bracelet
red beaded friendship bracelet detail


The way the generator works is that you choose the number and colour of the threads you want to use and then by clicking on the threads you can choose the types of knots until you get a pattern you like and then you can follow your own pattern. Now having said that I did get a bit confused with some of my own patterns!! :D
purple/crystal beaded friendship bracelet


purple/crystal beaded friendship bracelet detail

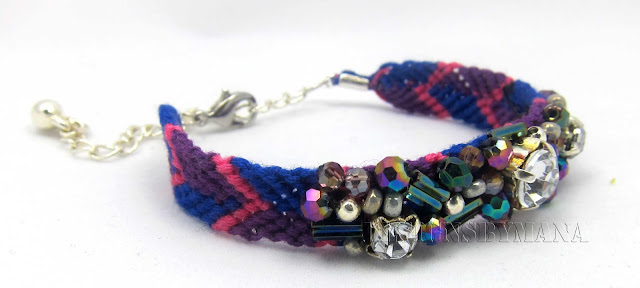
I started with the basic candy stripe and then moved on to the chevron pattern. Since it was my first attempts at making friendship, I made one too short I made the next one a little too long, I had no idea how to finish them off and I didn’t like the braiding and knotting method cause I find it hard to knot it around my own hand without help. I made adjustable braided straps and I didn’t like that either so I decided I was going to finish them off with lobster clasps, which meant ordering some cord ends.  
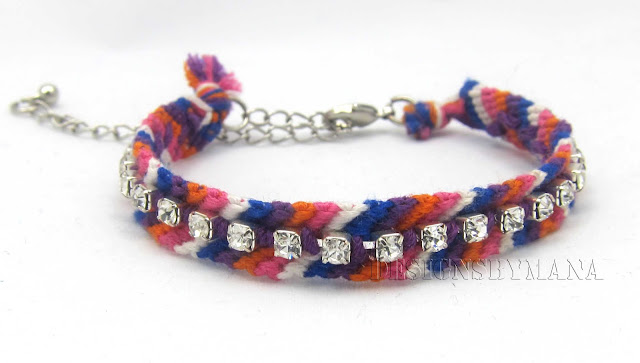
But knowing me I couldn’t just leave the bracelets be. I just had to do something to them. I had seen some friendship bracelets with crystal chains on them so I made one of those. Then I decided oh well why not just do any sort of bead mixture. I can use up the odd beads I have leftover this way.
crystal chain beaded friendship bracelet


After making a few of these I have learnt a few things: I know how long I should cut my thread to avoid wasting too much of it, how to make knots correctly so I won’t have holes in between the knots and also that I need to buy a pair of rubber pliers for closing the cord ends because all of mine came out scratched after I closed them with normal pliers and that is unacceptable to me specially if I decide to give them away or sell them at some point!
large crystal beaded friendship bracelet


For a 5-inch long friendship bracelet I use about 40 inches of thread with the cord ends and the chain extern added the length of the final bracelets comes to around 9 inches in total.
All in all these friendship bracelets are quite cool. They are really nice stacked together or mixed with other types of bracelets. I usually wear a couple of these with some bangles, thin metal bracelets.
beaded friendship bracelets


LIST OF MATERIALS USED:
EMBROIDERY FLOSS
BEAD MIXES
JUMP RINGS
LOBSTER CLASP


Posted by Mana © BeadFeast. All Rights Reserved

Wednesday, August 29, 2012

Turquoise Brooch


Turquoise Brooch

I try to some sort of beading every night otherwise I can feel myself getting lazy and to be honest I get this tingling feeling in my fingers that can only be eased by doing some sort of sewing or crafting!
Turquoise Brooch

 I work on one piece at a time and I try to spend as much time as I can on it to get it to a certain point, or even finish the piece off if possible, because once I get going I come up with ideas a lot easier and faster. Sometimes when I leave a piece and go back to it later my train of thought is broken and it takes me a while longer to get back into the groove of things, so when it is possible I try to do a piece in one sitting which sometimes means beading all through the night and going to bed at a crazy hour like 5am!!
Turquoise Brooch


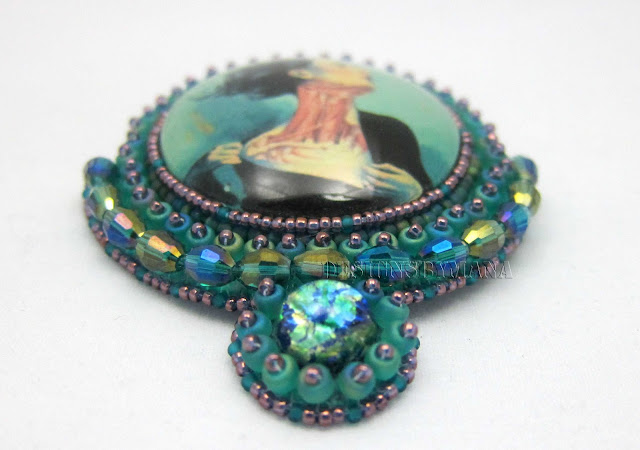
I wanted to make something today but I didn’t want to think about it too much. Brooches usually take up a couple of hours for me to finish so I decided on a brooch and when it came to choosing a focal image I went with an image I was familiar with and I knew I could easily work with.
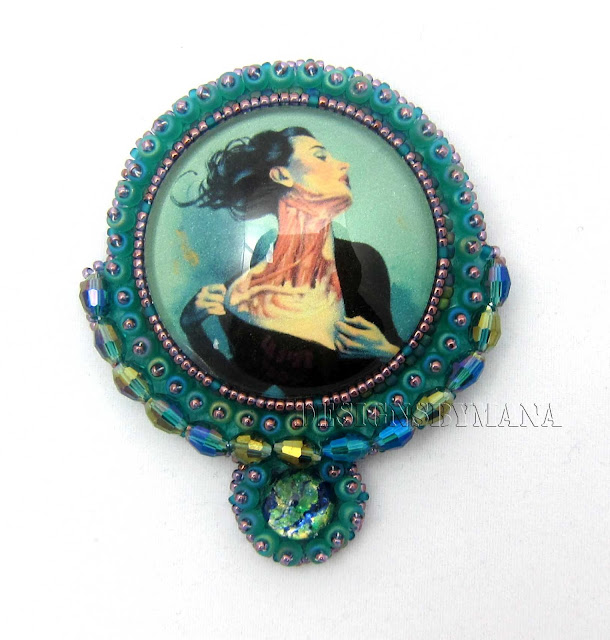
I chose another painting by Fernando Vicente called “Interiores”. I chose this image because not only is it beautiful but since I had already done another piece with similar colours I knew I had a good selection of turquoise colour beads to work with.

Turquoise Brooch

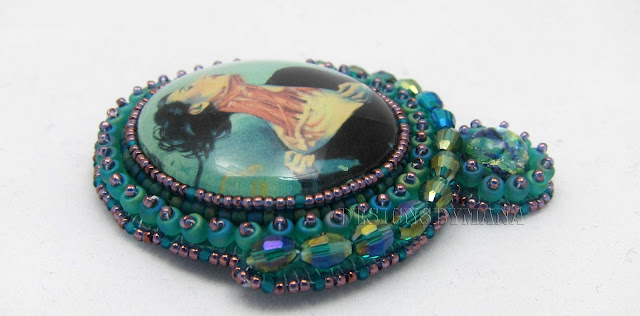
I kept this extremely simple. Once I had the bezel done I did a row of larger size beads and after that I wanted to use faceted glass beads but the size of the beads were such that if I went all the way around the piece there would be a gap that was too large to ignore and too small to fit another bead in so I went around half the piece.

Turquoise Brooch

 I could have finished off the piece at that point as well but I decided that adding a little bit extra wouldn’t hurt so I added a smaller cabochon with similar colours to the bottom and repeated the beading around it. I did a clean edge using the same colours I had used in the bezel to finish off the piece.
Turquoise Brooch

LIST OF MATERIALS USED:


Posted by Mana © BeadFeast. All Rights Reserved

Monday, August 27, 2012

Red Rose Shoe Clips


Red Rose Shoe Clips

This is going to be a quick post about another pair shoe clips.
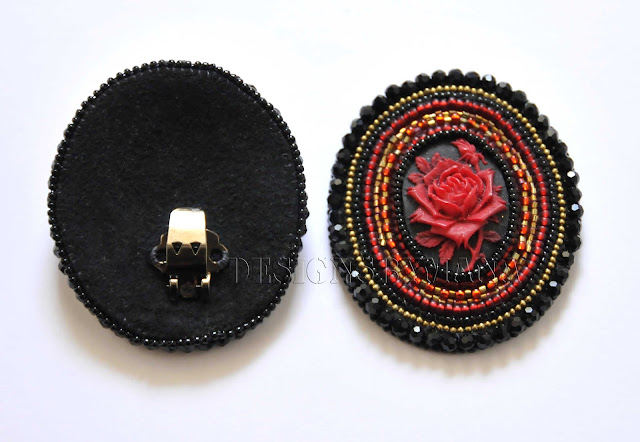
In my last post I mentioned that my mom had chosen another set of cabochon for me to turn into shoe clips for her and these are what I came up with.
Red Rose Shoe Clips

This pair is a second of three shoe clip pairs that I have made. I tried to use beads that complemented the red and black cabochon but just using black and red was proving to be a little tedious so I decided to use some gold in the piece to break it up a bit.
Red Rose Shoe Clips
Red Rose Shoe Clips

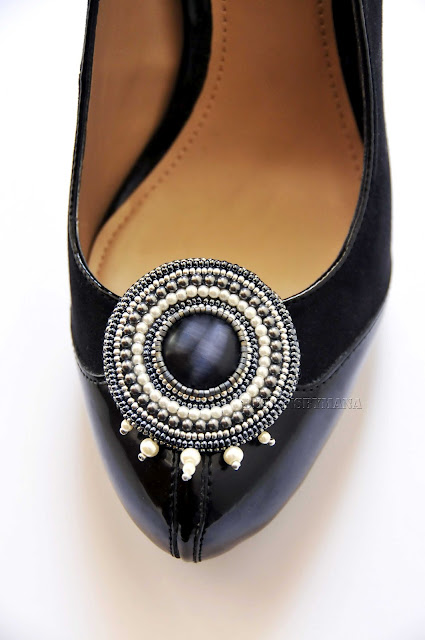
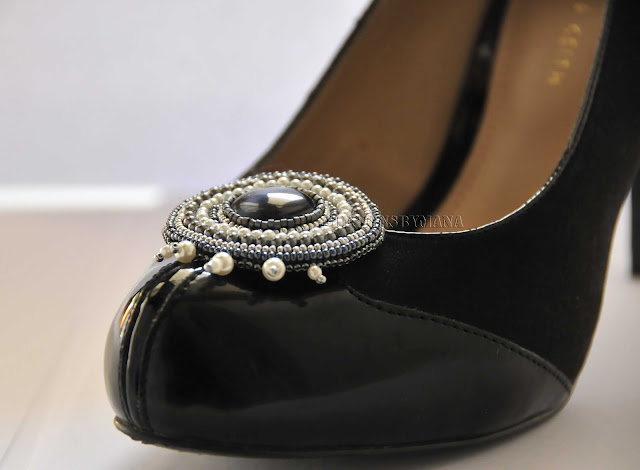
I think this is good example to show how different the same pair of shoes can look by using different shoe clips, with these things you can get more use out of plain shoes and also the good thing with these clips is that they are secure enough to be worn on garments so they can be used as brooches but you would need to clasp them on to the edge of something like a pocket.
Red Rose Shoe Clips


The only thing I would have done differently if I were doing this piece now would have been to use the last row of crystal beads on the edge instead of finishing off the edge with black seed beads .it’s a waste of beads as they are covered by the bigger crystals and I wasn’t planning on doing anything to the edge of the piece anyway  but I guess this is what experimenting is all about: Learning!!
Red Rose Shoe Clips


LIST OF MATERIALS USED:


Posted by Mana © BeadFeast. All Rights Reserved
Pearl Shoe Clips


Pearl Shoe Clips

The story behind this piece starts with a trip to Target!!!
I have to say I Love Target. It’s probably one of the only stores left where  I can still go and actually buy DVDs from. On one such outing to a nearby target store I separated myself from my mom to go perusing through the DVD isles while she took her time going through the rest of the store!
Once we regrouped my mom showed me these two shoe clips that she had found. The idea of shoe clips/brooch is nothing new but its not really something I have seen that often. A couple of stores sell them from time to time or you can find handmade ones on the Internet. Target had a couple of different designs but the ones my mom found had big chunky stones on them but every one of them was missing a piece. Since she really liked them we looked all over and were finally able to find a pair that was fully intact. We went exploring in a couple of other Target shops but we couldn’t find anymore of them!
Pearl Shoe Clips

Finally I gave up and told my mom that I would make her a pair using her favorite medium: Pearls!!!
The shoe clips are very easy to make, it is exactly like making earrings you just have to make an identical pair in certain size so that it would not be too big for the shoe. My only problem was finding the actual clasp that I could use to make the pair in to shoe clips.
I was able to find a couple of people on Etsy selling individual pairs for a couple of dollars but with the added charge of postage they would usually come up to about 6-7 dollars for a pair which to me was a bit excessive. Since we were planning on a little trip into NYC that week anyway, I decided to hold back and check out the bead shops in the city. I might be able to get lucky and if not I could always order off Etsy.
Pearl Shoe Clips


We went straight into the Toho store on Sixth Avenue. I have fond memories of this stores from way back .the first time I ever came to NYC was during my last year at UNI and I stumbled on to this store by accident trying to find shelter from the rain and I ended up buying a couple of things as samples for my final collection so this store still reminds me of that time even though it’s been a couple years since I have graduated!
Pearl Shoe Clips

At first I really didn’t think I would find any of these shoe clips in the store and I kept going round and round looking into all those little plastic cubes holding beads and such but just as I was about to give I found them for $1 a pair. I am so glad I held off ordering them off the Internet. I bought a few pair and my mom chose a couple of other cabochons she wanted made into more shoe brooches and then we were off!
Pearl Shoe Clips

These shoe clips are some of the first pieces of usable accessories that I ever made back in February when I started beading. Before this I used to make just beaded patches and sew them onto different things like my beaded gloves. Also At that point in time I only had a few different types of beads and I used nearly all of the in this piece.
Pearl Shoe Clips

The good thing about these shoe clips is that you can transform any shoe. If you are in the mood for fancier pair of shoes you can slap these pieces on and if you are not you can just simply take them off and you have your pair of plain shoes back and they don’t leave any marks or dents on the shoes and you can put them anywhere on the shoe to change things up!
Pearl Shoe Clips

LIST OF MATERIALS USED:


Posted by Mana © BeadFeast. All Rights Reserved

Saturday, August 25, 2012

The Pink Bow Brooch


the pink bow brooch


For every crazy, over the top piece that I make I try to balance it out with a simpler more restrained piece.
When I was studying fashion at Uni usually the more over the top pieces would get all the attention so we all tried to outdo one another but there is definitely something to be said about simpler things.
I was utterly surprised when this piece out of all the pieces I had made got the most attention between friends and family. I have to say the whole piece was so quick, easy and simple to make, that I was shocked it was evoking any sort of emotion.
the pink bow brooch

 I remember sitting down saying to myself that I wanted to make something simple but I just didn’t want to do a couple of rows around the main cabochon. So once I had the cab glued on my foundation I drew out a bow on the bottom of it and started beading.
The picture in this piece is another Lori Earley painting called “Lee, The Pink Sheep”. The name was a clue as to what colour I should start with and I decided I didn’t want any fuss with this piece so I stuck with pink and black. For just a little bit of sparkle and to define the knot in the bow I used a Hotfix crystal in the middle of the bow.
the pink bow brooch


the pink bow brooch


To finish off the piece I did a did a clean edge using the black hex beads I had used but when I got to the bow part those beads were simply too big and wouldn’t fit so I changed it up to size 15 round seed beads to finish up the edges around the bow. I have to point out that sewing beads to cover up the edges in these narrow corners is not an easy task and it doesn’t always look that clean but I have found out that if I use smaller size beads to finish off the edge they will usually get covered by the larger beads in the last row of the actual bead work so the piece doesn’t look bad at all.
the pink bow brooch

the pink bow brooch

I gifted this piece to my mom. She had asked to use it a couple of times and I thought it was only appropriate for her to have it. But my mom doesn’t live in the US and I really needed pictures of this brooch for my little blog so I would like to thank my lovely friend, Sanaz, for taking these photos for me. She drives me nuts most of the time but I love her to bits. Thank you for helping me out Sanaz!!

the pink bow brooch

LIST OF MATERIALS USED:


Posted by Mana © BeadFeast. All Rights Reserved

Friday, August 24, 2012

A Desolate Brooch!


desolation brooch

Today my camera decided to give me attitude. No matter which way I turned it or how I adjusted the settings it did not want to take a good picture of this brooch and I am sorry the quality of these pictures are not that great.
desolation brooch

I work better with darker colours as I have mentioned before. I find that I am less critical of my work when I used darker colours and that is probably because my brain has been better trained to work with darker colours. But I don’t want all the pieces I make to look the same so I have been experimenting more and more with the silhouettes I was looking at ornate mirrors when I came up with the design for this brooch. Also the curves on the top part of the brooch go hand in hand with the design on the face of the girl in the picture.
The main image in this brooch is from a piece called “Desolation” by Natalie Shau. I am not sure what medium she has used for this piece. The woman looks too realistic to be a painting but there are some artists that you can’t really tell if their work is a painting or a photograph when you look at it. I am not sure if this piece is a photo ,a painting or is mixed media,  but the detail in it is amazing , but it unfortunately doesn’t come through in my pictures but you can see the actual picture here:  http://natalieshau.carbonmade.com/projects/3192174#22
desolation brooch


Usually when I do my beading I like to stick with the two-bead backstitch technique only because in my limited experience they give clean lines and I can cover the whole surface without leaving any gaps with this method. But I find it really hard to do the two-bead backstitch to fill in small spaces so after consulting my beading book I went with a mixture of picot stitch and lazy stitch to fill the small spaces. As much as I like a picot edge I am not a big fan of the picot stitch. I don’t like the texture it creates (it reminds me of woolly carpets and I was never a fan of those either!!) but it is very effective in filling up small spaces and covering up the backing.
desolation brooch

I did a sunshine edge all around so that I could do some edging but when I was done I just didn’t think I needed an edging but the top part felt really heavy and decorated compared to the bottom part of the piece so I ended up adding the dangling part to the bottom to balance the piece out.
desolation brooch

LIST OF MATERIALS USED:


Posted by Mana © BeadFeast. All Rights Reserved

Thursday, August 23, 2012

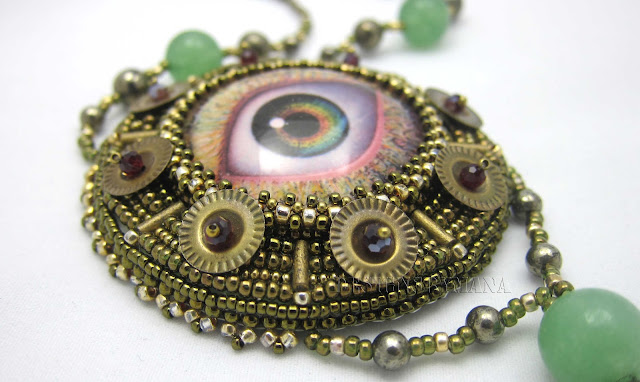
The Eye Necklace


The Eye Necklace

One of the fun parts of making bead embroidered pieces for me is finding the focal image. Searching books ,magazines and websites for focal images has led me to discover some amazing contemporary artists. Artists whose work I would probably never have found had it not been for my bead embroidery obsession!!
One such artist is Naoto Hattori. A Japanese artist who I believe is now based in New York. Sometimes reading about all these amazing artists and finding out that they are based in New York or have exhibitions going on in New York makes me really want to drive down to the city more often. I just wish I were a bigger fan of the city. I really don’t understand why I cannot form the same emotional connection with NYC as I have with London!
The Eye Necklace

Most of Naoto Hattori’s work reminds me of Dali’s work. Maybe it’s because of the juxtaposition of elements; with larger pieces surrounded by random smaller objects or the dreamlike quality of work. Whatever it is the work is very captivating and interesting and also a little bit chilling.
The focal image I chose for this piece is called very appropriately “Inner eye”. To me it looks like an eye coming through the desert or very dehydrated greenish skin.
My first instinct was to make it into a brooch but then I thought well, it’s an inner eye and wouldn’t it be more appropriate if it actually lay on the skin. And since a headpiece for me would have been totally unwearable I went with the next best thing: a necklace!
The Eye Necklace

The way the necklace sits on the body makes it look like one has an eye growing out the middle of one’s chest and I like that. And there was a funny incidence where me and a friend were sat in a Pedicab up in NYC and the driver kept turning around to look at me and he finally broke down and said “it is so freaky ,that eye on your chest , its staring at me!” I couldn’t help myself I burst out laughing! Now I suspect that our driver was a little bit high which he denied but he was very amusing! And the way he described the necklace was perfect! To me the fact that he thought the piece was creepy was a compliment! :D
The Eye Necklace

The Eye Necklace

I did something different with this piece. I have been wanting to use bugle beads in the actual bead embroidered part of the work but the gap that is created by using bugle beads is something that I do not like and initially I wanted to use just bugle all around the eye after the bezel work was done, to kind of make it seem like rays of sun, to make its look like the “inner eye” was shinning through or something cheesy like that. But I just could not get over the gaps. so next best thing was to use it sporadically in the piece and fill up the spaces with seed beads so there would be no gaps. After the beadwork was done I added these unusual sequins that I have had for years which I really wanted to use in a piece and I thought well why not this piece!
The Eye Necklace

The Eye Necklace

For the chain I used a mixture of the seed beads I had used in the bead embroidery part as well as the gold bugle beads. The good thing about using bugle beads and other bigger beads is that they add length to the chain without having to use too many of the beads. Making a whole chain from just seed beads uses up a lot of beads and in the end is not as interesting as using a mixture of bead and it is also not that economical!
The Eye Necklace


LIST OF MATERIALS USED:


Posted by Mana © BeadFeast. All Rights Reserved