Showing posts with label red. Show all posts

Wednesday, November 14, 2012

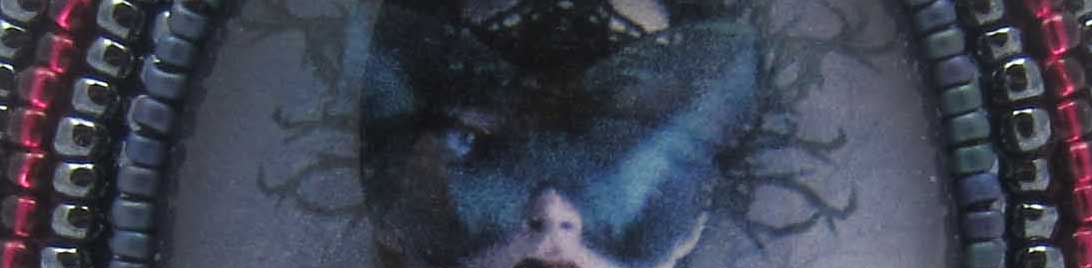
Black Wings Bracelet


I have been so busy this week work and I have to admit I love it, I love that feeling of having some sort of purpose but it seems like I can only do one thing at a time and I have really been neglecting my home life and my social life. Also I am so tired by the time I get home that I have been going to bed at around ten. I have always been a night owl, going to bed at let’s say  5 am is nothing new to me, I find it easier to work during the night, less distractions and all that but now I cannot wait to crawl into bed!
So lately in my beadwork I have been more and more into tightening my colour palette and not using every single bead I possess in every piece. I know I tend to get a little bit overboard with my bead usage. So I set out to only use three colours with this bracelet: red, gold and black. Also for backing I used black Ultrasuede tacked onto Lacy’s stiff stuff.
I really liked the way that the hex cut beads looked in my last bracelet and since I have a huge package of those I decided to use those beads as the main body of my piece.
As always I started with my bezel and then moved on to the wing portion, which I had already mapped out on my backing. In order to get the piece as symmetrical as possible I did one side first and then moved on to the other so I could make everything match. So the number of beaded lined on each side is the same.
I was really happy with how things were looking after the first couple of black rows but I wondered if the piece would look very flat by using only black. So I decided to incorporate different types of stones in the same colour palette. Luckily I had just enough red fire polished beads to finish this bracelet off .so I decided to use them to separate the black sections.
I also didn’t want to use any other cabs but then I decided I needed to. The red cabs that I used are Mexican opals in dragon breath. I loved the colours of these. They are a nice red but in a certain light they look somewhat blue but when I glued them on my backing, which was black, they completely lost their appeal. But since I didn’t have any other cab that would have worked I decided to draw around the cab and cut the Ultrasuede up so that I could glue these cabs on to the Lacy’s stiff stuff. Once the cabs were glued onto a white background they got their blue tint back. I am just glad that the whole thing worked otherwise I would have had to undo all the work and start all over again.
I kind of only noticed the red lights on the model’s face when I was done with the piece, it kind of looked like the red cab underneath it was the cause of all the red lights on her face and I really liked that.
 
Once the body was done I decided to not add any decorative edge as I thought the piece looked fine as it was and the good thing with a decorative edge is that it can be added whenever, so if at a later time I think it needs it I can go back and do that without any problems. To finish off I added a gold clasp to the bracelet and it was all done.
 

Posted by Mana © BeadFeast. All Rights Reserved

Wednesday, October 17, 2012

Emancipation Brooch


I have been so tired lately and I blame the squirrels!!
So a week or so ago I started hearing these really weird sound echoing all around me which turned out to be some squirrels that have made themselves feel right at home just on my bedroom ceiling and are partying up there all night long, every night. good for them but not good for me!!
My eyes are closing as I am writing this but I decided to write a small post for two reasons: first, I don’t really like to ignore the blog specially now since it’s a brand new blog and it’s a baby and needs more attention and secondly I was told off by my mom for not having updated the blog for 3 days!! Now I don’t know about you but I loathe disappointing my mom more than anyone else!
This is a small brooch I worked on a while ago when I had absolutely no idea what to do. I kept wanting to come up with elaborate, grand designs and I couldn’t get a solid idea going so I went to the other end of the spectrum by going completely simple.
And apparently when I go simple I go really simple. I used an image from Natalie Shau called “ Released Time” and grey and red painting and hence the grey and red beadwork.the painting is breathtaking and I really suggest you visit her website to get a better sense of how beautiful and detailed her work is
The design as you see is as simple as it gets, the only new thing about this piece is the edge finish in which I used drop beads which give a fun effect and I wonder why I haven’t used this type of finishing on any other piece since! Hope you guys enjoyed this piece even though it’s rather plain and simple!!
LIST OF MATERIALS USED:


Posted by Mana © BeadFeast. All Rights Reserved
Tuesday, September 11, 2012

Portrait of Ira P Necklace


I have mentioned I am going back and posting my earlier pieces now that I have photos of them to share.The piece here marks my first ever attempt at making a necklace. I had made pendant like stuff but this is the first complete necklace .
I am not so much into ultra feminine pieces , I like things a little bit more edgy and to be honest the only reason I chose this Tamara de Lempicka picture was because I had a good lot of red stones and beads that would work with this piece and I was still trying to figure out my own style of doing things.
Looking back my earlier pieces I can see how simple they are but I also remember how hard they were for me to figure out at that point. The component making part was ok because I had some practice with the beading part but conneting the pieces together and making it into a functional piece was a totally different story ,it still is to be honest. I still struggle with attaching clasps and such and if I could find a class that taught the basics of jewelry making that worked with my schedule I would be the first to sign up!
This piece, apart from from the resin cabochon with the Tamara de Lempicka picture , uses two ruby red paua shell cabochons. After finishing off the components ,came the dreaded time of attaching everything together.
I believe I strung on the different beads a hundred different ways and in different sequences in order to get them the right length and have them lay in the way I was looking for. I am probably exaggerating by saying it took a hundred tries but it sure felt like it! It was enough to put me off trying to make another necklace for a while , this might explain why I have only made a handful of necklaces since I started beading.
When the stringing part was finished  came the next obstacle! Attaching the clasp! I went through the loop of the clasp with my thread a couple of times and just went down through the strung beads until I got to the first beaded component where I went through the beads with my string to make it as secure as possible. It was only a week or so back  when I was looking for a better way of attachhing clasps and looking at how other beaders are attaching their clasps that I was finally able to figure that there was a better, cleaner way of attaching clasps!! Oh well at least I know what to do from now on! :D
LIST OF MATERIALS USED:


Posted by Mana © BeadFeast. All Rights Reserved

Monday, September 3, 2012

Skull and Rose Brooch


Skull and Rose Brooch


I have been struggling lately coming up with designs for my bead embroidery. I have been sketching trying to come up with things but none of them really pulled me in to try and start a piece. So I decided to just start a piece and see where it takes me.
Skull and Rose Brooch


I chose my favorite type of subject,” skulls”. This skull is a painting by Scott Sceidly called “Billie”.
If I don’t have a plan in mind I usually decide what to after my bezel work is done by placing different stones and cabochon around the piece to figure out the next step. Once I was done with the bezel I decided to add another cabochon to the piece but instead of putting it on the bottom where I usually do I decided it was time for me to shake it up a bit so I moved it to the side!! For someone who likes things to be symmetrical this is a huge step!!:D
Skull and Rose Brooch

After sewing on a couple of rows of beads around the smaller blue goldstone cabochon and adding a few rows to the main cabochon, I still felt that the piece needed something to give it a little bit more pizzazz if you will!
Skull and Rose Brooch

I added all the marguerites I had left over, around the piece, concentrating most of them around the smaller cabochon and the opposite side of the piece.
Skull and Rose Brooch

Skull and Rose Brooch

Now at this point I was really chuffed with the piece. it had exceeded my expectation more so because I had no expectations to begin with :D
To finish the piece off I went with something a little different for the edge work by using different size of bugle beads on the edge.
Skull and Rose Brooch


LIST OF MATERIALS USED:


Posted by Mana © BeadFeast. All Rights Reserved

Saturday, September 1, 2012

Red Lotus Brooch


Red Lotus Brooch

Now that I am looking back at the pieces I have been making this past few months and writing about them in detail, I am amazed to see that I have chosen one artists work more than any other to do beading around and that artist is Natalie Shau.
When I choose the image for my focal piece I don’t pay any attention to whose work I am necessarily choosing, I go by the gut feeling of maybe the image can inspire my beading,
 The works of Natalie Shau I have done beading around have all been different from each other but I am guessing that the underlying feeling of the pieces is something I am inherently drawn to and that’s why I have probably done 6-7 pieces around her paintings.
Red Lotus Brooch

The image in this brooch comes from an album art she has done for “the cradle of filth”. I couldn’t find a title for this painting anywhere but the woman in the painting looks very medusa like even though the hair is not made of snakes, but I guess that’s what it reminds me of.
For the beading part of this piece I wanted to go with something grand, something that resembled royal crown jewels to be more specific. The image is so disturbing that putting it in a classy jewel setting was odd enough for me to be interesting.
Red Lotus Brooch

I looked at a lot of crown jewels and simplified some of the patterns that were used in them and came up with some designs.  I was settled on a design that most resembled a lotus flower shape and  I drew it on my backing and started to fill it out. I used mostly the lazy stitch to cover the piece (because of the small spaces and the odd angles I had to fill out) except for where I was sewing definite bead lines where I used the trusty two-bead backstitch.
Red Lotus Brooch

Once the edges were cleaned up, in order to make the design more reminiscent of crown jewel-like designs I used some crystals and fringe beads to act as accent drops from the points I had created in the shape to complete the look.
Red Lotus Brooch


LIST OF MATERIALS USED:


Posted by Mana © BeadFeast. All Rights Reserved

Monday, August 27, 2012

Red Rose Shoe Clips


Red Rose Shoe Clips

This is going to be a quick post about another pair shoe clips.
In my last post I mentioned that my mom had chosen another set of cabochon for me to turn into shoe clips for her and these are what I came up with.
Red Rose Shoe Clips

This pair is a second of three shoe clip pairs that I have made. I tried to use beads that complemented the red and black cabochon but just using black and red was proving to be a little tedious so I decided to use some gold in the piece to break it up a bit.
Red Rose Shoe Clips
Red Rose Shoe Clips

I think this is good example to show how different the same pair of shoes can look by using different shoe clips, with these things you can get more use out of plain shoes and also the good thing with these clips is that they are secure enough to be worn on garments so they can be used as brooches but you would need to clasp them on to the edge of something like a pocket.
Red Rose Shoe Clips


The only thing I would have done differently if I were doing this piece now would have been to use the last row of crystal beads on the edge instead of finishing off the edge with black seed beads .it’s a waste of beads as they are covered by the bigger crystals and I wasn’t planning on doing anything to the edge of the piece anyway  but I guess this is what experimenting is all about: Learning!!
Red Rose Shoe Clips


LIST OF MATERIALS USED:


Posted by Mana © BeadFeast. All Rights Reserved

Wednesday, August 22, 2012

Viva La Muerte Brooch


Viva La Muerte Brooch

Have I mentioned that I love skulls!??? :D
I believe I have, in every other post and I am really sorry that I sound like a broken record but it might go some way in explaining some of the upcoming blog posts.
My latest work is done around a cabochon featuring the work of Brian M. Viveros titled “Viva La Muerte” from his Southern collection.
Viva La Muerte

Reading through his website he is described as a “Fetish Artist” who specializes in” erotic paintings of doe-eyed beauties with Marlboro’s dangling seductively from their lips" and that's probably the most accurate description of someone's work I have ever read
I am also a huge fan of tattoo art and I have a lot of respect for that type of art but I am deathly scared of getting a tattoo knowing that I would regret it the moment the needle touches my skin. But if I were ever going to get a tattoo, something like this painting would be what I would gravitate towards.

Viva La Muerte

I have meaning to do a sexy red and black piece since I had gotten some red crystals from New York a couple of months back and this picture had the same sort of colouring as what I had in mind. the only thing was that with the background of the painting being black and my beads being all dark the whole brooch was going to end up being too dark so in order to avoid that I added a multi-colour opal cabochon that has hints of the same colours as you can see in the main cabochon; but it’s lighter so it brightens the piece up a little bit.
I have also been really into using different shapes and size of glass beads in my bead embroidery just for adding interest and breaking the monotony of just working with seed beads.
Viva La Muerte

Viva La Muerte

In this piece I also ventured away from my usual all-around picot edge by mixing it with some stacked, free form edging.

Viva La Muerte

LIST OF MATERIALS USED:


3x4 FACETED GLASS RUBY BEADS FROM THE BEAD GALLERY
3MM FACETED GLASS ROUND RUBY BEADS FROM THE BEAD GALLERY


Posted by Mana © BeadFeast. All Rights Reserved