Showing posts with label beaded jewelry. Show all posts

Sunday, September 22, 2013

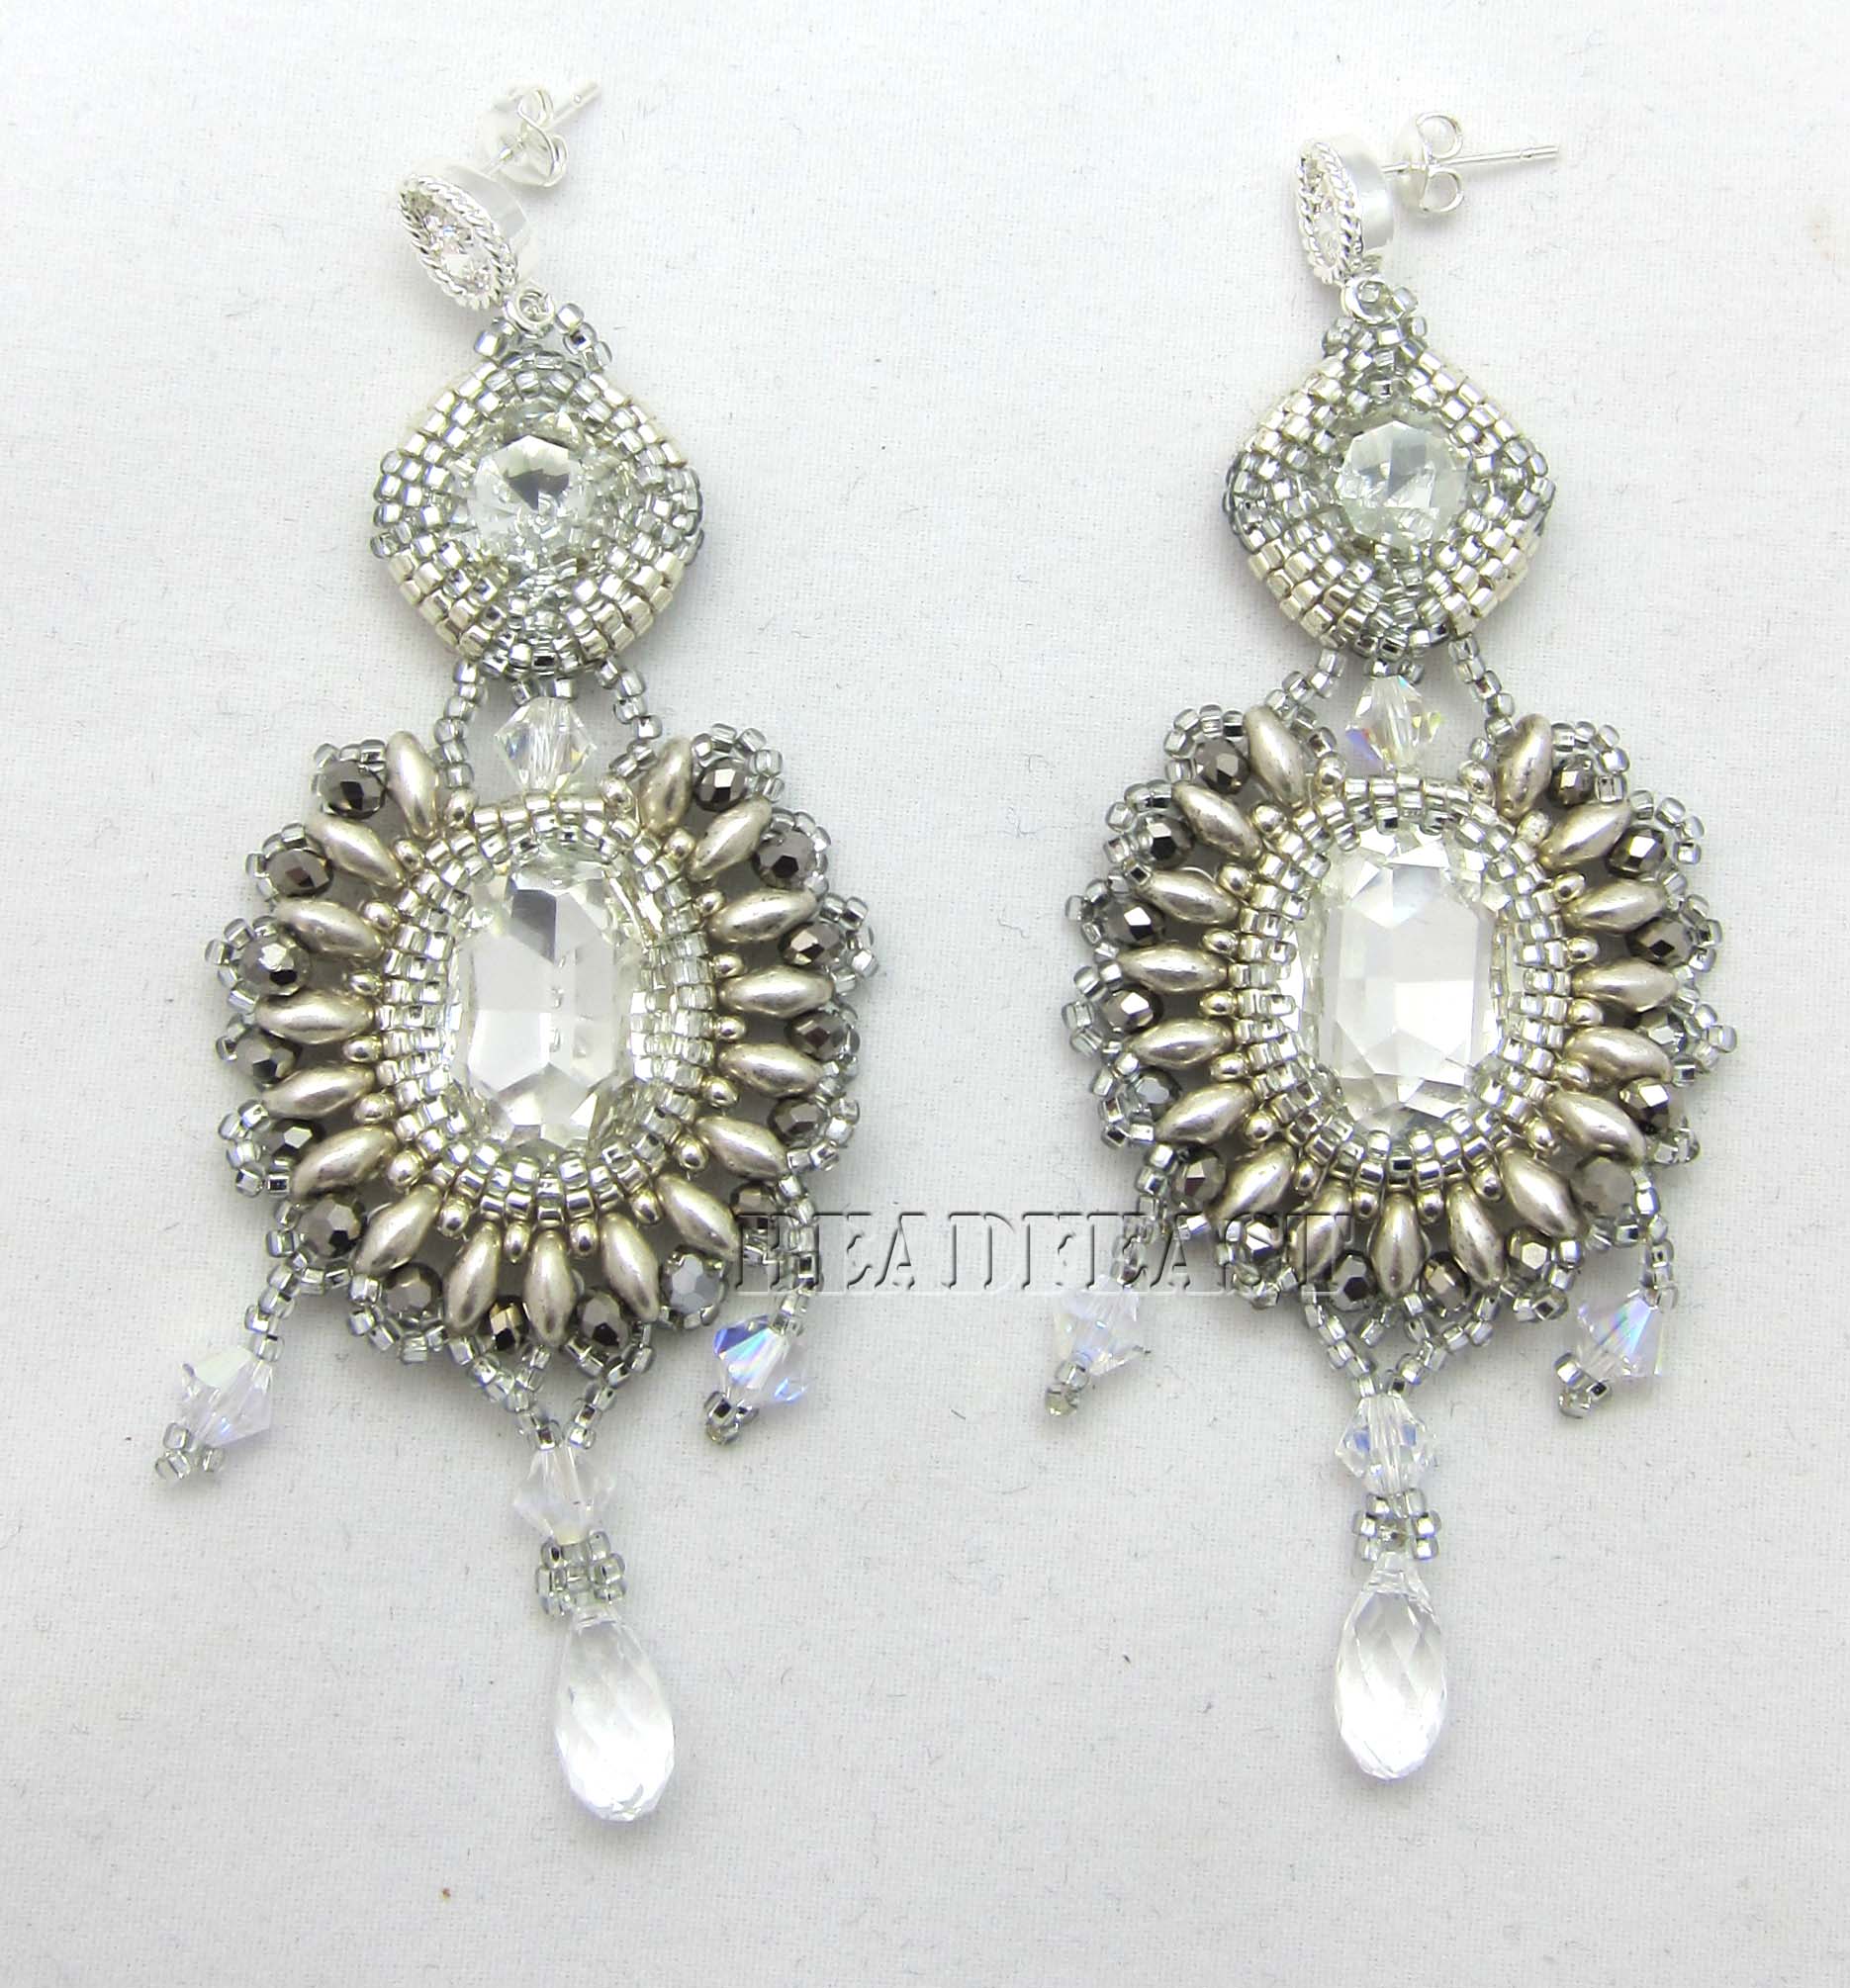
Crystal Chandelier Earring


crystalchandelierearring
One of my coworkers has a bit of a problem with the back of my bead embroidery pieces and no matter how many times I explain to him that this is the way to finish off the back of bead embroidery he still says well why don’t you cover the back of the piece with beads too. It might all be well and possible to cover both sides of a bead embroidery piece (not that I see the point of using up beads for the back of a piece) but in order to address this issue I just decided to give beadweaving a go. Kill to birds with one stone: learn a new technique and have the backs of the work covered in beads so he would stop going on about it! :D
chandelierearring12
The piece I am covering in this post is not my first attempt at beadweaving a piece together (I started with simpler bezels) but since this piece is made specifically for someone and I have to give it to them tomorrow I decided to write about this one first .
a few weeks ago a colleague of ours from our corporate offices asked me to make her a clear crystal chandelier earring and I said ok. Twenty minutes later she gave me a call and insisted that I should make the chandelier earrings look sexy too! Now I have no idea how to make earrings look sexy so I was a bit stumped at this point and to be honest with you because I had no idea how much she was comfortable paying for the finished piece I didn’t want to go on a crazy bead shopping spree (which I am really good at) and spend loads of money on crystals and beads. So I was very adamant on using whatever I had.
chandelierearring7
I was lucky to find some swarovski crystals in my stash that I had completely forgot about and put together all my beads in the clear and silver family in front of me and started to play around
chandelierearring3
chandelierearring4
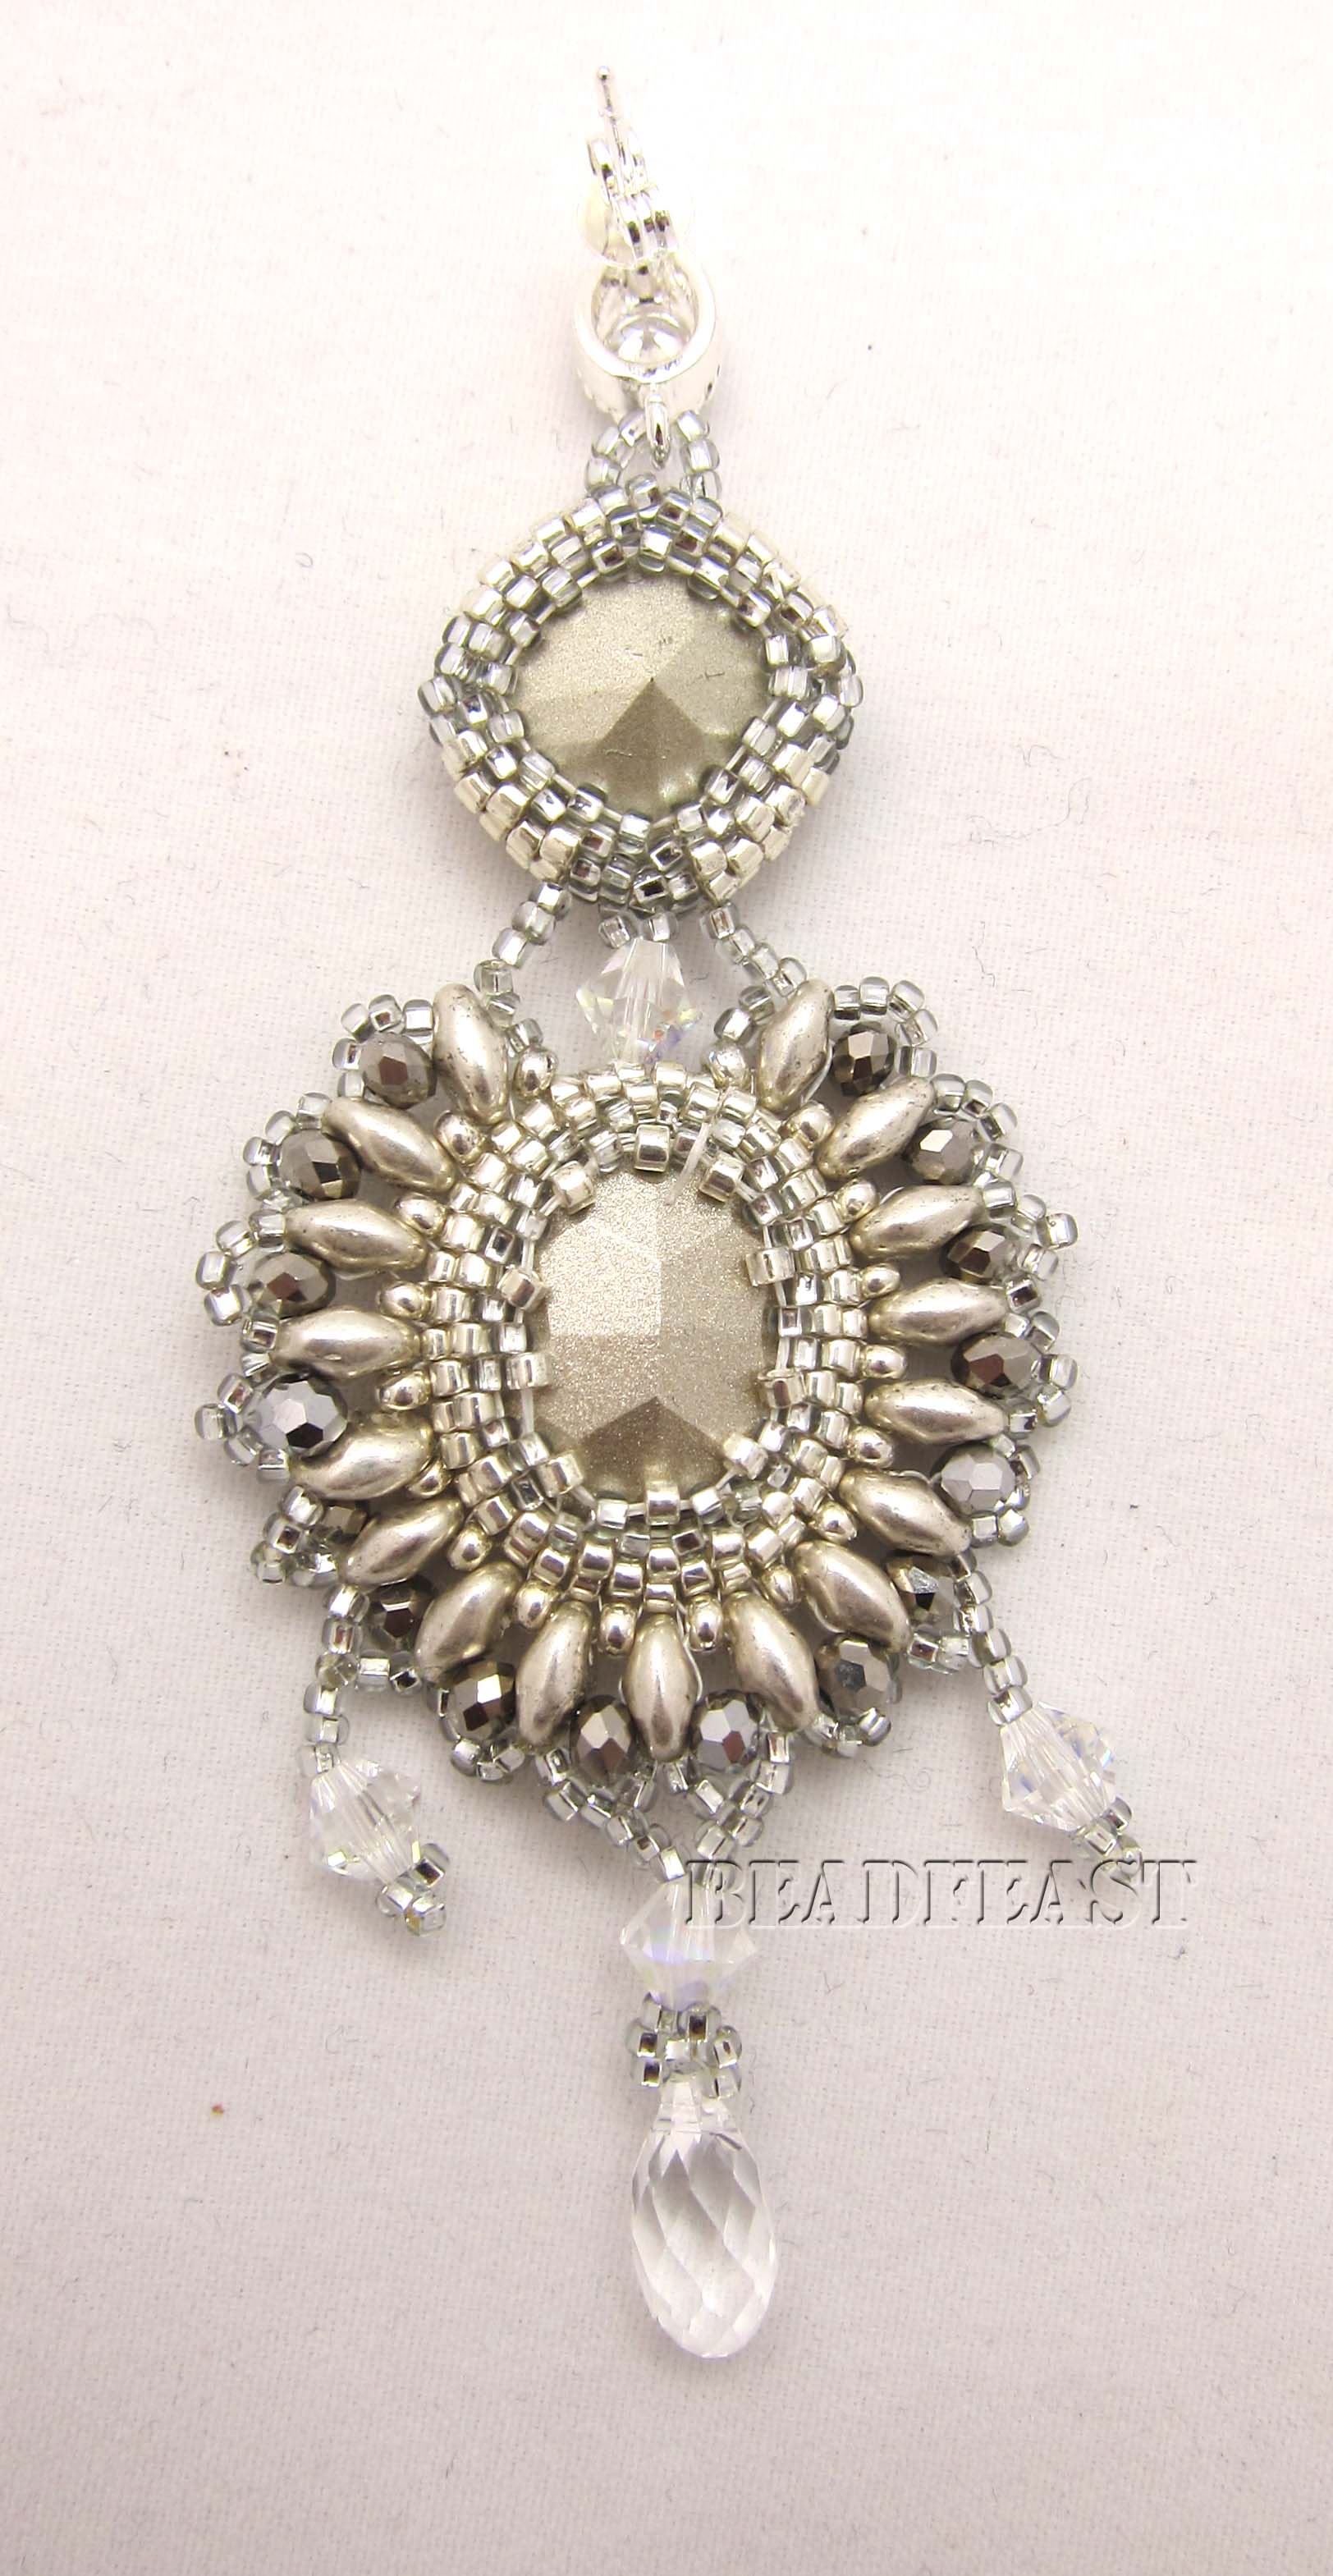
I started this piece by bezeling the oval piece first. I do have to say I am really bad at finding out how many beads I need to start with so I went with a Ladder/Brick stitch technique I learned on the bead and button website to start the bezel for this piece which made it a little bit easier to do. It is frustrating getting the stone to sit in the bezel and not move around when you are trying to capture it in the bezel and this is probably why bead embroidery to me is still so much easier to do. At least with bead embroidery your stones don’t keep running away from you every two seconds.
chandelierearring6
Once the bezel was done I added a row of seed beads around the bezel to allow me to do the decorative edge. Nowhere is where the fun kind of started. I have never used superduo beads before and I was itching to incorporate them somewhere in my work so after each bead that I had added to the outside edge of the bezel I added a silver superduo bead. Once I stepped up to the top hole of the superduos , I started adding faceted silver beads which helped with the extra sparkle I was looking for and then I covered those beads by going around one more time and adding size 15 seed beads to give it a more finished look.
chandelierearring11
To make the piece in to a chandelier type earring I started adding the bicone drops on each side and the bigger crystal drop in the middle to finish it off. To me this was enough to make the earring pass of as a chandelier earring.
Now bezeling the square swarovski crystal on the top of the piece was a whole different story. I had so many problems with this piece I was ready to throw in the towel. What made it worse was that I was so engrossed in figuring out how to bezel the damn stone that I forgot to make any notes on what I was doing so when it came to bezeling the second stone I had no idea what to do again which made it even more difficult because I had to make sure that the piece matched the first one I had made so that both earrings would look exactly the same. I kept referencing my first piece and in the end I just had to try and make at similar to each other, as it was humanly possible
chandelierearring7
chandelierearring10
I have to say both earrings don’t look exactly the same but the discrepancy is so small that it can be overlooked. I have already shown the picture of the piece to the person I have made these for and thank god they liked it cause otherwise I would have had to redo the whole thing .i just hope that they like the piece when the see it in person tomorrow.
chandelierearring2
Anyway I hope you guys really enjoy this piece too and that it can inspire you guys to make something sexy too: D
Posted by Mana © BeadFeast. All Rights Reserved

Tuesday, December 25, 2012

Leather,Gold and Turquoise Bracelet


turquoise gold and leather bracelet4
Merry Christmas everyone!
I hope you have all had a wonderful and special day today. I for one took this day to rest and clean up my flat! Here is the thing; I believe I might be the only person in the world that goes to work on their day off because they just enjoy being around the people that they work with. And since today was the only day that no one was going to be at work I had no choice but to sit around the flat and get some of my own work done!
turquoise gold and leather bracelet3
I love my co-workers they are fun, funny and they make me feel less alone in this world and I love spending every single minute that I can with them! So since I have started working at this place I think I have only not gone to work on my off days to hang out maybe just once or twice. But whenever I go for a couple of hours I make sure to take some of my beading to get done over there which for me feels like killing two birds with one stone; not only do I get to have fun but then I am doing something that I love to do on my time off anyway.
turquoise gold and leather bracelet6
So last week when I was there for a visit I had taken this huge 2-inch turquoise stone to do some beading on. My aim was to either turn it into a brooch or a necklace. But as soon as I took the stone out of my bag to start my work my manager asked if the piece was I was working on was for her. To be honest I had already made her something for Christmas with gold and turquoise charms (knowing that she loves anything turquoise) but when she started dropping hints that she wanted the stone I was working on as a bracelet then I just had to do it.
turquoise gold and leather bracelet7
The problem is she has teeny tiny wrists and the only way I could make a bracelet for her without measuring her wrist was to make a bracelet using a bracelet base.
I have seen a lot of these bracelets using bracelet bases but I have never done it and my manager had a very specific design. She wanted a gold bezel on a leather base and nothing else. So something very simple and for those of you who have seen my previous work you know that I do not do subtle. Restraint is not something I exercise much of in my beading!
turquoise gold and leather bracelet8
My other problem was that I only had a few hours to make the bracelet. Our office party was on Saturday and she started telling me about what she wanted on Thursday afternoon so this piece was done rather quickly because I had already decided to make a whole load of muffins and chocolate mousse to take to work on Saturday, thank god I had Friday off so I could get everything done
Doing a bezel is easy and it doesn’t really take me that long. I glued my cabochon onto a faux leather piece, which was all I had and did my rose gold and gold bezel. The main struggle with this bracelet was figuring out how to use the bracelet base and how to bead around it and I didn’t find it that easy to do.
turquoise gold and leather bracelet
I bought a bracelet base from Michael’s that had a flatter top, which was somewhat perfect for the huge turquoise stone because it gave it more of a flat base to sit on. The only thing with the bracelet base was that it was not a solid bracelet base so in order to stop the filigree pattern that the bracelet had from showing through once the leather was glued onto it I also used a layer of Lacy’s stiff stuff so that the pattern of the bracelet would stay hidden.
turquoise gold and leather bracelet9
I glued the leather with the beaded turquoise stone on to the bracelet and trimmed around it, I cut another piece of leather and glued it to the inside of the bracelet and trimmed that as well .if I had time I would have waited a while for the glue to dry off before starting to finish the edge but I just had to get it done so I could wrap it and go to bed, so I set out finishing the edge. The one thing about working with the faux leather that I didn’t like was that the stitches were very visible and that doesn’t sit well with me. Since making this bracelet I have made another one for myself, which is a little bit different, and I have use Ultrasuede in that one and the stitching is not visible at all and I love that. I will share pictures of that bracelet in another post having said that I think I need to do more stuff with leather backing so that I could get comfortable with and make my stitching on leather nicer and neater. If any of you guys have used a bracelet base and know of an easier way to trim and finish the edge please let me know, I really need some help in that area!
turquoise gold and leather bracelet2
I finished the bracelet around 1am and went to work the next day at around 7:30, suffice to say I was beat but the look on her face when she opened and saw the bracelet was all worth it.
So anyway I hope you guys enjoyed looking through the pictures of this bracelet too and hope you have had a wonderful Christmas!
turquoise gold and leather bracelet1

Posted by Mana © BeadFeast. All Rights Reserved

Saturday, December 15, 2012

Black Spiked Bracelet


spikedbracelet8
HI friends!
I feel like its been ages since I had a free moment to update my blog, well to be honest it has been a while and my mom keeps reminding me that I haven’t put anything on my blog which makes me feel bad but I have been crazy busy. So today I decided to bring in my laptop to work and use my lunch hour to update my blog.
spiked bracelet

spiked bracelet
I have been trying to bead any chance I get and since starting this job I have gotten a few orders from my colleagues but this bracelet I am writing about is a one of the last pieces I finished just before hurricane sandy.
spikedbracelet
A week or so before sandy I discovered this amazing bead shop in NJ called Blanche’s bead store. The store seemed very small from the outside but omg when you pass the threshold and walk in you are transported into bead heaven. Needless to say I went nuts in the store and bought way more than I had anticipated. But one thing I was very chuffed to find was these sew on spikes I had been looking for, for some time and they had them in quite a few different colours. I also ended up buying these metal hex cut beads that looked somewhat like very small Czech beads.
spiked bracelet
 I knew I had to make something with the spikes as soon as I got home, so I went through all the pictures I had made into cabs and chose this one painting by Oleg Dou which I though was perfect.
spikedbracelet2
Sometimes I find working with different finishes of silver a bit challenging. It seems that sometimes different finishes and colours can be either too dull or too shiny and they don’t necessarily look good sitting next to each other but I soldiered on until I was somewhat happy with how things were working.
spiked bracelet
I used my maleficent bracelet as an inspiration for the beadwork on this piece and once I got into the swing of things I started changing it around a bit so it wouldn’t look too similar to the other bracelet.
spikedbracelet1
One thing I have to mention is that the spikes get stuck on everything so just sewing them on is not actually enough because they turn over when the get caught, so I ended up putting some glue on the bottom of the spikes to they would stay put!
spikedbracelet12
spiked bracelet

Posted by Mana © BeadFeast. All Rights Reserved

Wednesday, November 7, 2012

The Angel Bracelet


To say that this week has been the most bizarre week of my entire year would be an understatement! First off I really thought I had lost my mind this past week; I went a little bit stupid without electricity! So much so that I vouched to go and visit Thomas Edison’s grave once my power came back on and to my surprise I found out that his grave is somewhere in New Jersey, this whole thing cannot be a coincidence! So when the weather is better I would need to go and pay my respect because as of Monday my electricity has been back on!

On Sunday night I went to bed after putting on as much clothing on as I could and snuggled under my two heavy-duty duvets! As I was tossing and turning trying to get warm enough so I would fall asleep I heard a weird noise! I think it sounded weird because I hadn’t heard that noise in nearly 10 days. The air conditioning was making noises; I jumped out of bed in a daze and turned the lights on! OH MY GOD!! POWER! I went in to the living room turned my TV and computer on and everything was working, you should have seen me I was standing in the middle of the room flooded by artificial light and I was completely gob smacked, my mouth opening and closing like a fish! Then five minutes later the power went out again and I was ready to burst out crying but I thought that would be silly so I went back to bed! And then two minutes later the power came back up again and then went out again, and the pattern went on for a couple of hours but I am so so so glad that the power is back on and everything feels so normal! To top off such an amazing day I got a call to say that I was hired at this place that I had applied for a job and that I could start the next day!

So I think I have been like somewhat of a headless chicken this past week with all the different problems with what happened here in New Jersey and I have been trying to adapt to this new schedule that I am on so I feel I have really neglected my blog.but we will blame sandy for that!

I made this piece a month or so ago. I had been drawing a lot of patterns that resembled wings and I had been trying to experiment with different curves and shapes. Also I had been meaning to work with these hex cut type beads that I have had for a really long time!
Since the shape reminded me of wings I went with grey/clear palette although one of the hex cut beads seems to have a purple tint to it but I still think the colours work together well.

I have also been wanting to do a full row of bugle beads around a piece but I haven’t been able to get them to sit right. Every time I tried I got really weird gaps and I don’t like gaps but I was determined to try it out and maybe because I used a smaller size bugle beads (3mm in this case) the gaps were not too bad and I could get the bugles as close together as possible while following a tight curve around the centre cabochon. I also used the same bugle beads for the edge finish to give the bracelet more of an angelic/feather/ ray of light type of feel in keeping with the theme I was going for.

It feels great being back on the blog and being able to post about beading again and I hope you have enjoyed this piece! I also hope that it would stop snowing now, I have work tomorrow and I really don’t enjoy driving in the snow! Good night everyone!

LIST OF MATERIALS USED:

  • OVAL WHITE CABOCHON           
  • 20x15 CAT’S EYE GRAY CABOCHON
  • SILVER TEARDROP GEMSTONE BY RECOLLECTION
  • 5MM HEMATITE RONDEL STONE BEADS
  • 2MM CRYSTAL CHAIN
  • 3MM GUNMETAL BUGLE BEADS
  • MATSUNO SILVER HEX 2-CUT BEADS SIZE 11/0
  • MATSUNO SILVER-LINED TRANSPARENT PURPLE HEX 2-CUT BEADS SIZE 11/0
  • SILVER LINED DARK GRAY SEED BEADS SIZE 11/0 SB1563
  • SILVER SEED BEADS SIZE 11/0
  • ANTIQUE SILVER PERMANENT GALVANIZED SEED BEADS SIZE 11/0 SB2600
  • SILVER LINED CRYSTAL SEED BEADS SIZE 11/0
  • DBS 0251           
  • SILVER LINED PALES GRAY SEED BEADS size 15/0 sb3399
  • METALLIC DARK SILVER SEED BEADS SIZE 15/0 SB3197
  • CLASP
  • GRAY ULTRASUEDE
  • LACY’S STIFF STUFF
  • FIRELINE 0.006” IN CLEAR


Posted by Mana © BeadFeast. All Rights Reserved

Saturday, October 20, 2012

Sparkly Turquoise Earrings


Ahhhh what better way to spend a Saturday evening than sitting down and watching My Fair Lady? As I am writing this, poor little Eliza is trying to pronounce words beginning with H and setting fire to things! What joy.
My favorite part of the movie has to be the embassy ball with that amazing crystal necklace! Which brings me to today’s little beaded piece, which is a mixture of turquoise and crystals.
 
The idea for this came from my turquoise bracelet which I had made a long while ago. I was really happy with how the beads and crystals worked together so I decided to make a pair of earrings to go with the piece.
I didn’t have any more of the green crystal pieces I had used on the bracelet so for these earrings I substituted them with a pair of turquoise cabochons and for the bottom part of the earring I used a larger swarovski crystal stud earrings which I cut the backs off in order to use as the focal component.
Hope you guys are having a wonderful weekend and If anyone is interested in these earrings they are available on my Etsy.
LIST OF MATERIALS USED

▪                15mm Round Glass Cabochon – Turquoise
▪                SWAROVSKI CRYSTAL STUDS
▪                SILVER LINED OPAL BLUE/GREEN SEED BEADS SIZE 6/0
▪                TRANSPARENT MEDIUM SEA GREEN AB SEED BEADS SIZE 11/0
▪                TRANSPARENT OLIVE BRONZE LUSTER SEED BEADS SIZE 11/0 SB2518
▪                METALLIC DARK OLIVE GREEN SEED BEADS SIZE 15/0 SB3451
▪                4MM GLASS FACETED BEADS IN PARROT FROM THE BEAD GALLERY
▪                TRANSPARENT GOLD AMETHYST SEED BEADS SIZE 15/0 
▪                10mm SURGICAL STEEL FLAT GLUE ON EARRING POST
▪                LACY’S STIFF STUFF
▪                GREY ULTRASUEDE
▪                FIRELINE THREAD 0.006 IN CLEAR
▪                E-6000


Posted by Mana © BeadFeast. All Rights Reserved

Thursday, October 11, 2012

Amethyst Purple and Crystal Earring


I don’t know why but lately I have been really into making earrings. I think it’s probably because they are quicker to make and I am less afraid to use colour in smaller pieces than I in bigger pieces. To be honest I am not sure. I was never much of an earring wearer to begin with. I am more of a bracelet and ring person but I am not sure if a bead-embroidered ring would work.
When I was putting together pieces that I could use in earrings I came across these wonderful faceted square Swarovski crystals that my mom had sent me. The good thing about them was that they didn’t have any holes for sewing through in them, bad thing about them was that they had a faceted back and I was bit iffy about using them.
So the challenge for this piece was gluing the faceted piece to the backing. I had read in the dimensional embroidery book that the way to use these types of stones was to use some sort of air-dry clay under them to make some sort of a setting. I was a little apprehensive to be honest about how to actually do it but after doing more research and finding no other method I decided to just give it a try.
The book says to use air-dry clay and the only type that I found on the day that I went to Michaels was the Martha Stewart’s crafter clay, which is very puffy and kind of reminds me of marshmallows. I made small balls and put the stone on top of the clay ball and pushed it down onto a flat surface to make the setting that the gem would sit in and trimmed the excess clay. Once the clay was dry I checked to see if it was actually stuck to the gem and I found that I could easily peel it back. the thing is that once the bezel was done , the gem would have been completely encased in the beads and would not have fallen out but just to be on the safe side I decided to  glue the stone to the setting and then sanded them a little so that the setting would be as thin as possible and then glued it on to my backing.
Once that whole section was done then it was off to doing the bezel work and the beadwork. For these earrings I went with a gold and bronze palette to compliment the vintage purple cabochons.
The thing with beaded earring as I found out is that they are very lightweight. I usually don’t wear earrings because after a while my ears start throbbing but I have been really comfortable with the beaded earrings that I have made for myself. I think it is probably because there is no metal setting involved in making the earrings, which makes the pieces very light and hence comfortable to wear.
 
LIST OF MATERIALS USED:


Posted by Mana © BeadFeast. All Rights Reserved

Sunday, October 7, 2012

Blue Goldstone Earrings


True to form I managed to waste my whole Saturday, I had so many plans. I think it’s because I heard back from one of the jobs I had interviewed for and I was told that I was overqualified which is the most bizarre explanation for not giving someone a job ever in my opinion! After reading the email in a half asleep state this morning I decided to take a portion of the day and wallow. I mean no one should start their Saturday with this type of email. So I moped about for a while going through the 7 stages of grief but apparently It took more than a few hours to get over the news because I suddenly looked at the clock and its now nearly 1:30 in the morning. Nooooo!!
 I might have wasted my whole day but I am not going to waste my night so I have decided to write up a quick post.
A while back I shared pictures of a piece I had made which I had yet to finish. You can see the original post here.
I finally decided it was time to do something with the piece and even though I had originally made the pieces for gloves, in the end I decided it would be best to make them into earrings.
I used crafters ultimate glue to glue the piece to Ultrasuede making sure to glue a couple of millimeters away from the edge. This is so that the needle could go through the backing and the Ultrasuede easier but if you decide to do this and get glue to the edge don’t worry the needle still goes through, it might need a little bit more coaxing at times but it will go through,
I was thinking of doing a clean edge around the piece but since I had used bigger beads in my last row of beading I thought that doing a clean edge might look a little bit weird so I opted to do a sunshine edge and do a basic picot edge to finish the piece off.
LIST OF MATERIALS USED:

Posted by Mana © BeadFeast. All Rights Reserved

Wednesday, October 3, 2012

Gold Sparkly Earrings


One of my proudest moments in the bead embroidery journey was when I finished my first bracelet. I just kept thinking that making a whole beaded bracelet was going to be such a huge ordeal and what if I don’t like the piece and what if I can’t do it and all that. It is funny that I am always one of those people who tells everyone to try something and if it doesn’t work out they will know for sure but I seem to not want to take my own advice. I mean giving advice is so much easier than taking it , right!
But I am glad I started making bracelets and its ironic that the reason that I like making bracelets now is the exact reason why I avoided them in the first place. Now I like having to spend time on a piece for more than a day or so, because the process is calming and it gives me time to think and plan new pieces in my head. Also because there is more space to fill out with beads I get to experiment more with different techniques and shapes, which I normally don’t do on smaller pieces. And sometimes when I am experimenting with the patterns on a bracelet I get inspiration for other pieces.
That is exactly what happened when I was done making the Golden Cicada bracelet. I loved the sides of that bracelet and when I was looking at it I thought why don’t I just turn that shape into earrings.
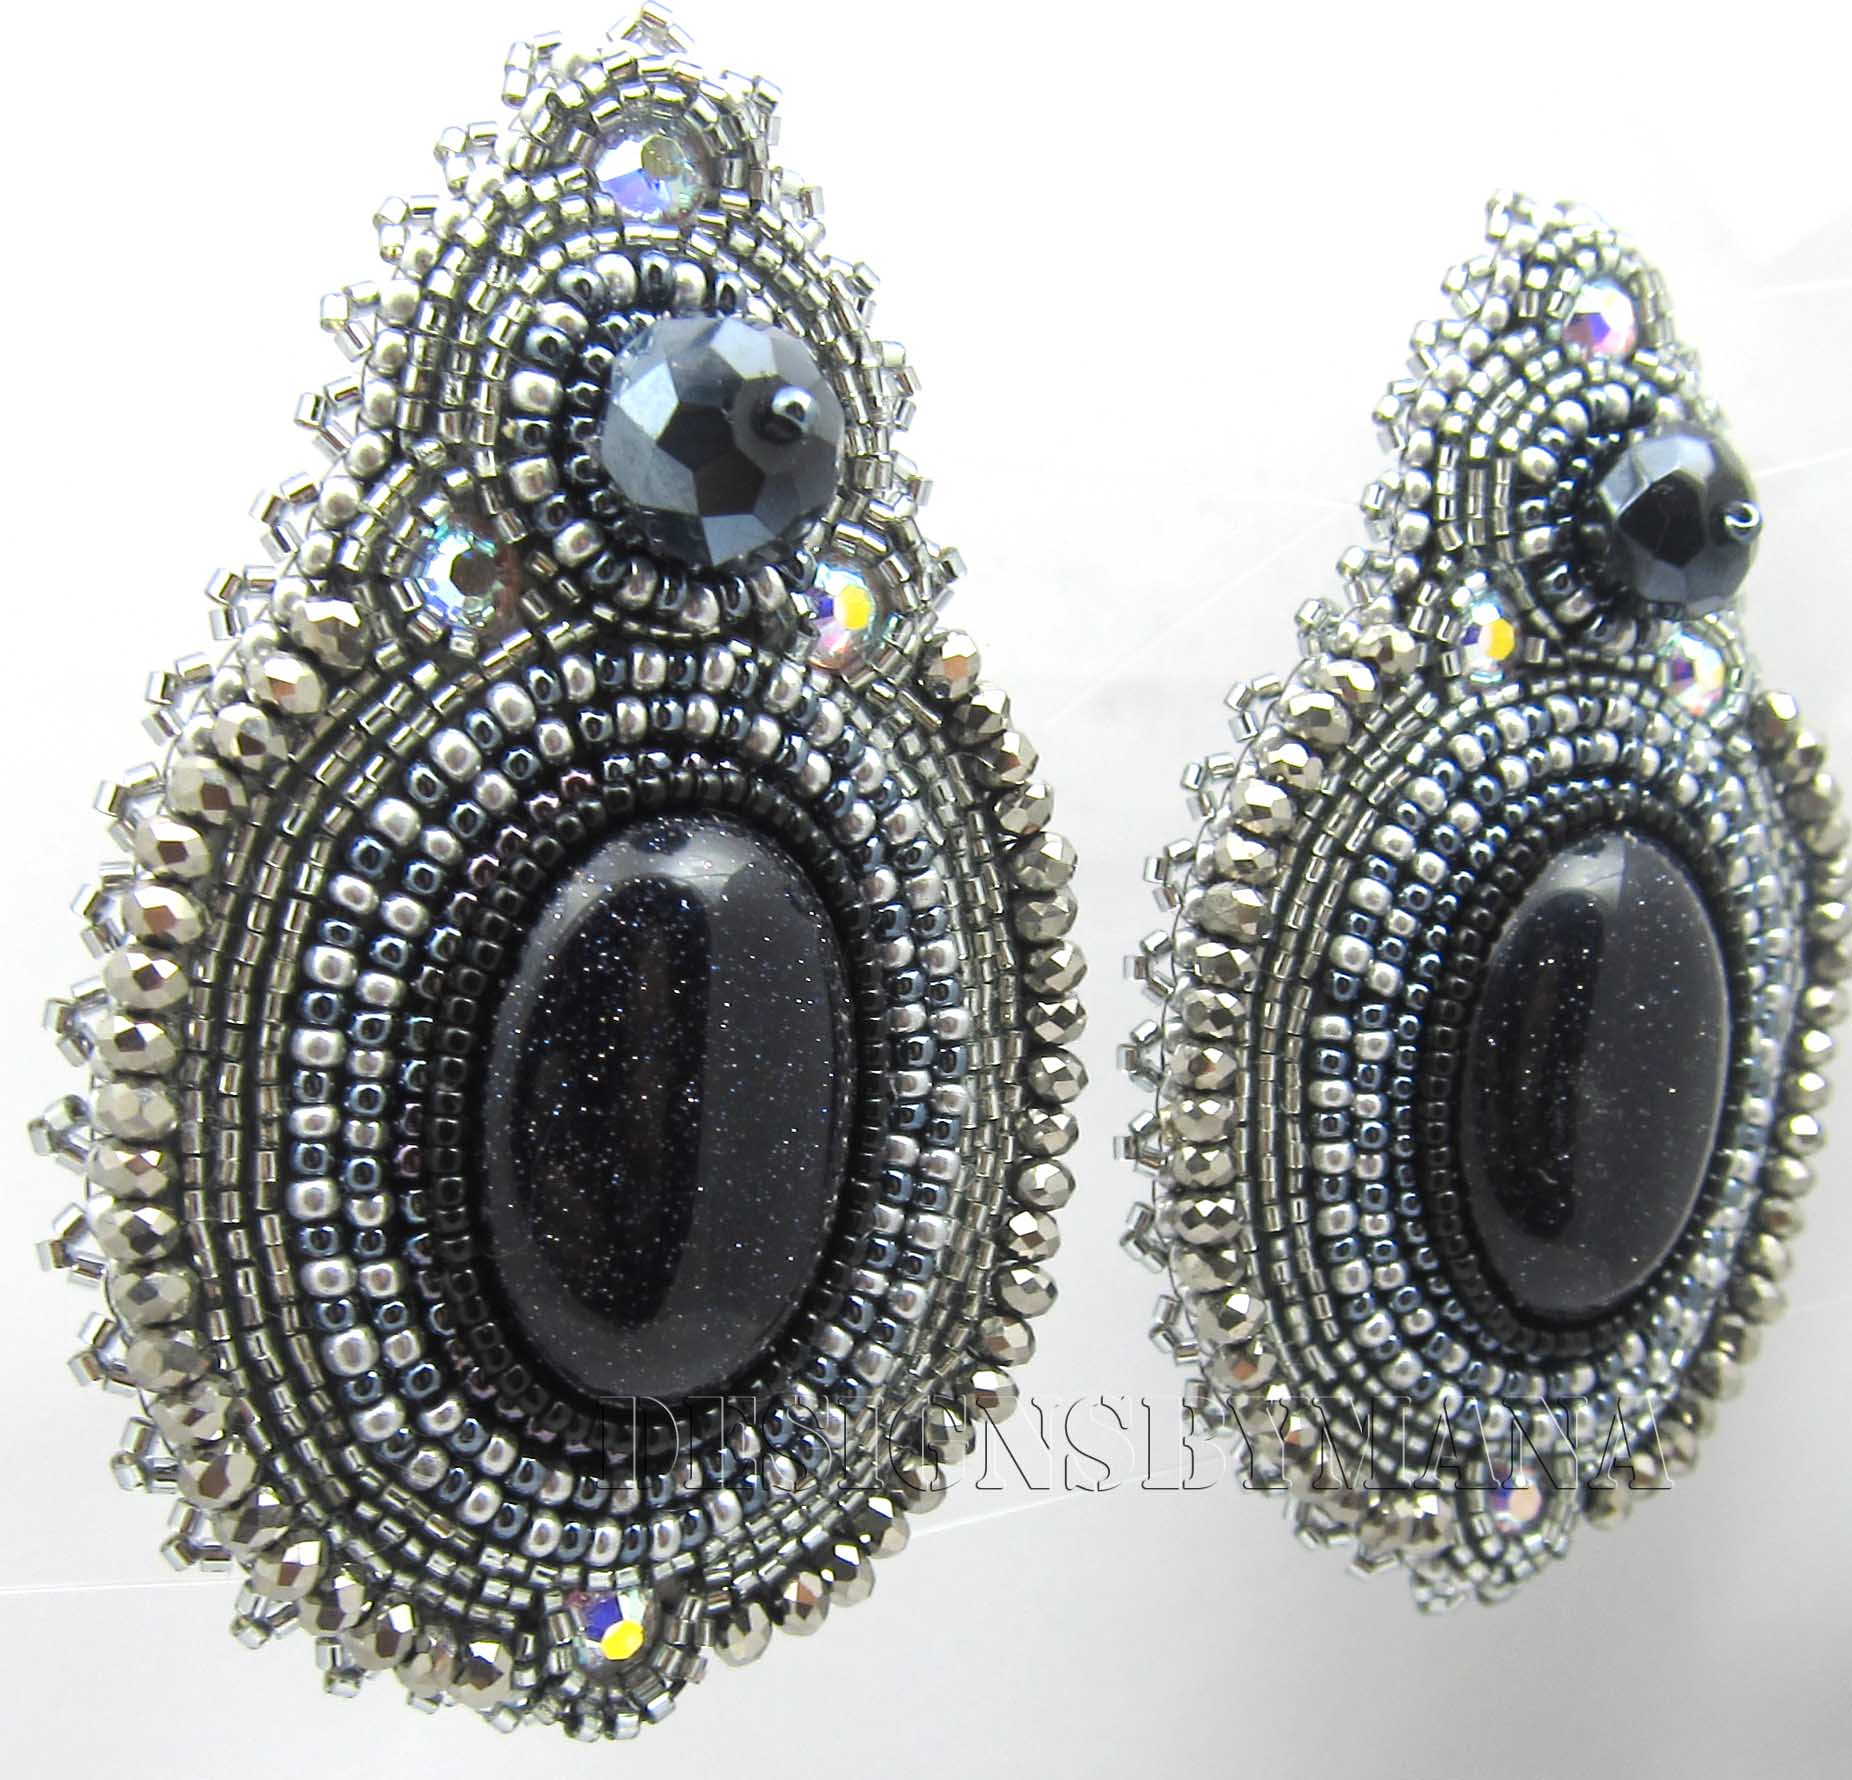
Good thing was that I still had enough of the material to make a pair of earrings and because I had already made that pattern once the pieces came together all too quickly.
For me these type of projects are the stuff I like to do when I am not inspired to make anything new but I still don’t want to sit around and twiddle my thumb. The pattern is already there I know what beads I am going to use so I don’t have to sit around for hours trying to decide which beads would work well together which is my main obstacle when planning my pieces
But having worked with this pattern twice now and liking how it turns out I know now that if I were to change the colours and use different beads it would still give me something unique. That’s the beauty of a good pattern and a pattern you like to work with!

LIST OF MATERIALS USED:

Posted by Mana © BeadFeast. All Rights Reserved