Can you believe the weekend is over? I spent the whole of Saturday waiting for a package that never arrived and then after doing my weekly shopping I decided to go through my scrapbooking supplies and see what I could get rid off. Suffice it to say that by the time I looked through just half the stuff I had I was a little bit ashamed of myself for spending that much money on things that I don’t use. I love paper but I am no scrapbooker .I think I need to find a way of selling all the dies and punches and stamps I have accumulated in the past year. There is no point in them just sitting in drawers.

But before the weekend is over I want to at least get one post finished in order to achieve one positive thing. So this post is about one of my earlier pieces, which means it was done roughly 4-5 months ago when I was in my resin cabochon-making phase.

There are a few setbacks to these resin cabochons. First of all it takes a long time for them to get made and you never know if the finished product is going to come out perfect (without pesky air bubbles or watermarks) until it is all done and over. Another thing that can go wrong with the cabochons is the thickness of it.

For my pieces I used to do a thin layer, put the picture in let it cure for 12 hours and then add a layer of black. But after a couple of uses my molds became a bit lopsided so some of the cabochons were thicker on one side and thinner on the other even though I tried to get it as level as possible. This means that when it comes to bezeling the piece it would look weird. And no matter how much I sanded the piece I could never get it completely even which is why I ultimately switched to clear domes.

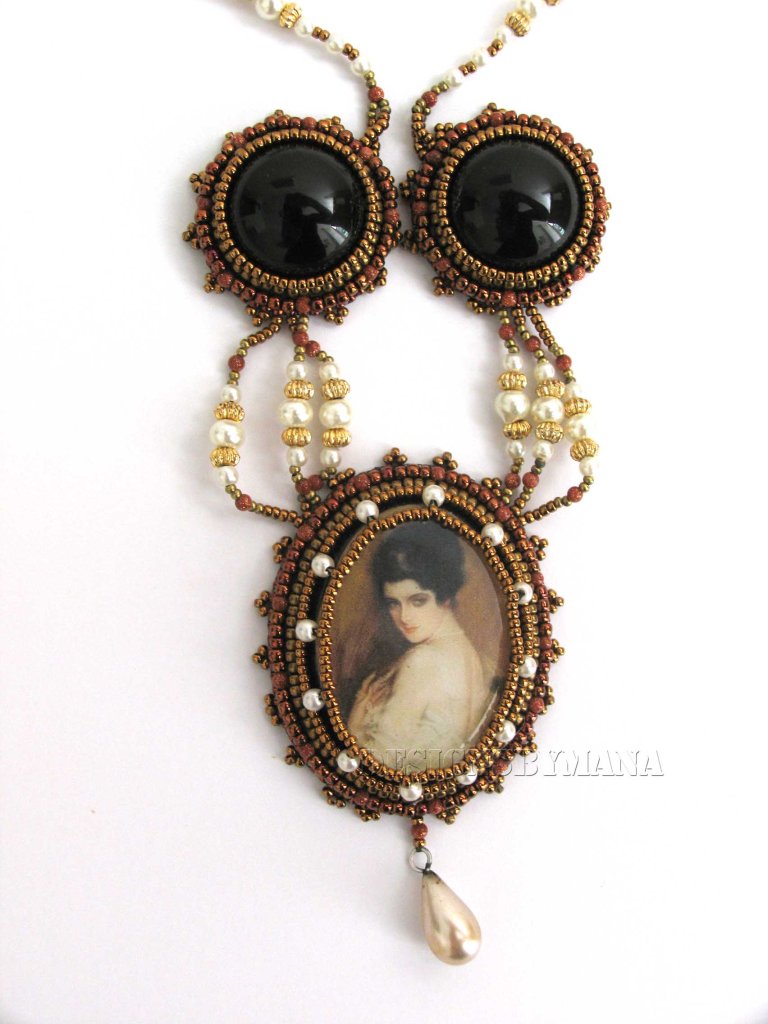
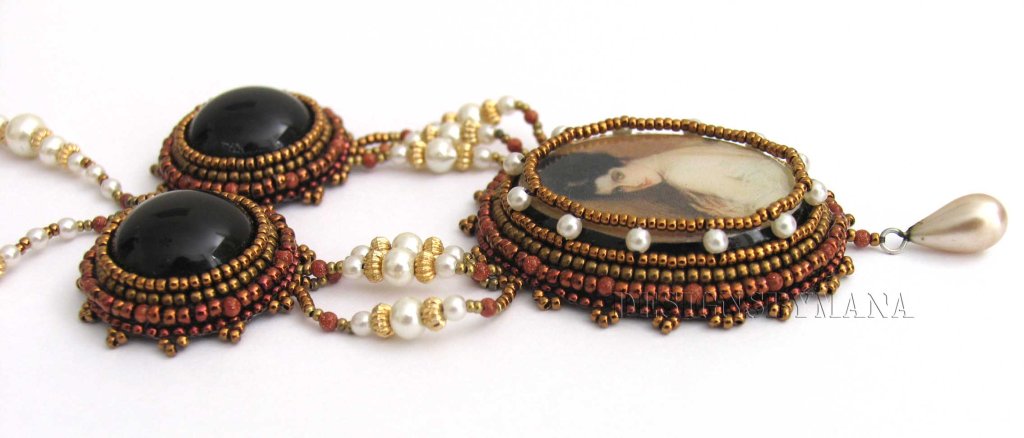
This resin cabochon was made using a painting by Harrison Fisher titled “lady with dark hair”. The cab that I had made was too thick so I had to come up with a way of covering the sides and at this point I was only doing stacked bezeling and hadn’t learnt the how to do peyote stitch bezel .so after the initial two stacked rows I decided to add the one thing I go to when I can’t find a bead that works: pearls.

I went through the size 15/0 beads and came out ever 8 beads to add a 2mm pearl stacked with a size 15/seed bead. Once I had gone all around the piece I only had to go through one of the size 15/0 beads on top of a pearl and start adding size 15/0 beads to close the gap between the beads and form a bezel around the cabochon.

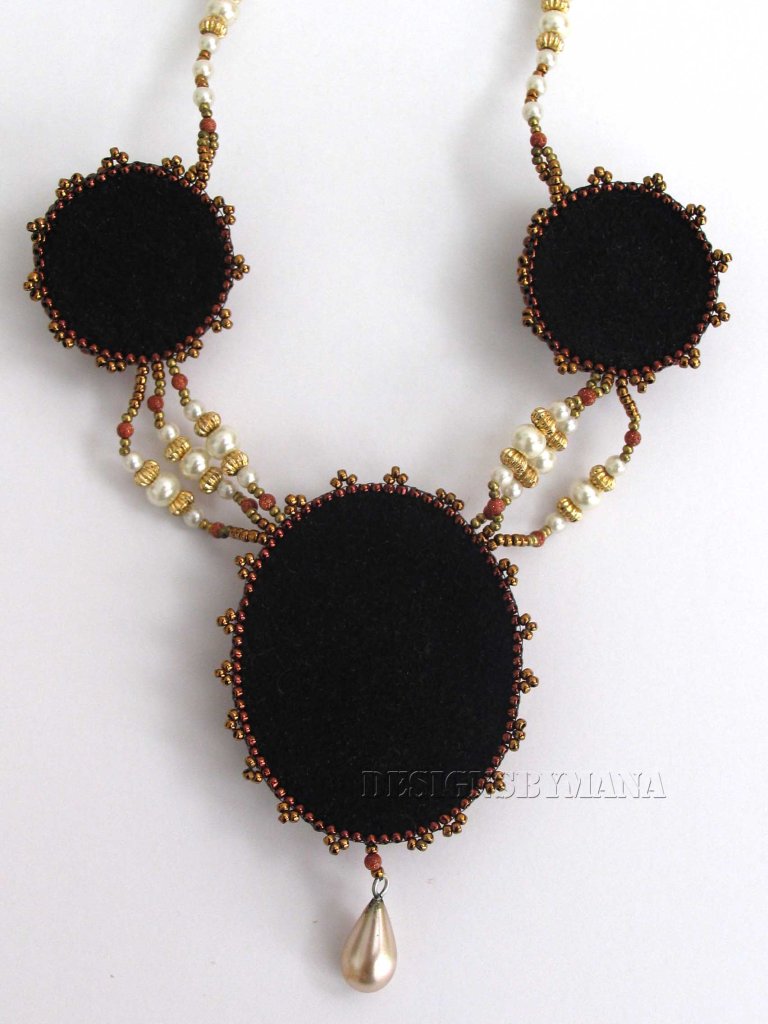
After I was done with the main piece I made two other smaller pieces to match the main piece and I just had to connect everything together. I made a simple chain with the beads and pearls that I had used in the main pieces and attached a spring clasp. Unfortunately I didn’t know how to attach clasps back then and you can see that I have gone around the loop of the clasp with thread a few times to secure it on and I don’t like that I can see the thread .so next time I go back home to visit my parents I have take this necklace from my mom and fix the clasp issues.

LIST OF MATERIALS USED:
- 2mm WHITE PEARLS
- 3mm WHITE PEARLS
- 5mm WHITE PEARLS
- 18mm JET BLACK ROUND CABOCHONS
- GOLD SAUCER SHAPED RIBBED SPACER BEADS
- TEARDROP VINTAGE PEARL
- 2mm BROWN GOLDSTONE BEADS
- METALLIC KHAKI BROWN SEED BEADS SIZE 11/0
- METALLIC BROWN SEED BEADS SIZE 11/0
- METALLIC LIGHT BRONZE SEED BEADS SIZE 15/0
- ANTIQUE COPPER SPRING CLASP
- FIRELINE THREAD 0.006” IN SMOKE GREY
- LACY’S STIFF STUFF
- BLACK ULTRASUEDE
- E-6000 GLUE
- CRAFTER’S PICK THE ULTIMATE GLUE
Posted by Mana © BeadFeast. All Rights Reserved
I love paper but I am no scrapbooker .I think I need to find a way of selling all the dies and punches and stamps I have accumulated in the past year.
ReplyDelete